Do you need to quickly create a live poll for an upcoming meeting or event? Live audience polling at events or meetings are a breeze with MeetingPulse! With a free trial of our audience response app, you can be up and running live in no time, gathering relevant real-time feedback from any audience.
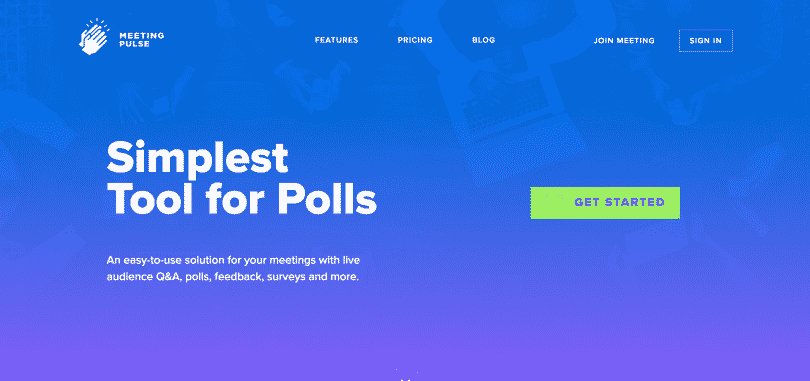
To get started, simply go to the MeetingPulse website at and follow the prompts as shown below. Our interface is simple and easy to use. First, click on the “get started” button.
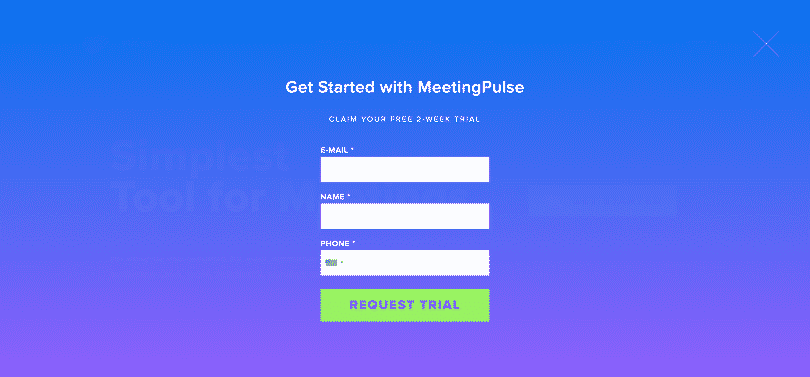
Next, tell us who you are. Provide us with your email, name, and phone number. We like to know our users, so we personally approve each trial by hand.
After submitting your info, you’ll see a confirmation page. We will review your information and send an access email with a temporary password and instructions to create a personal password.
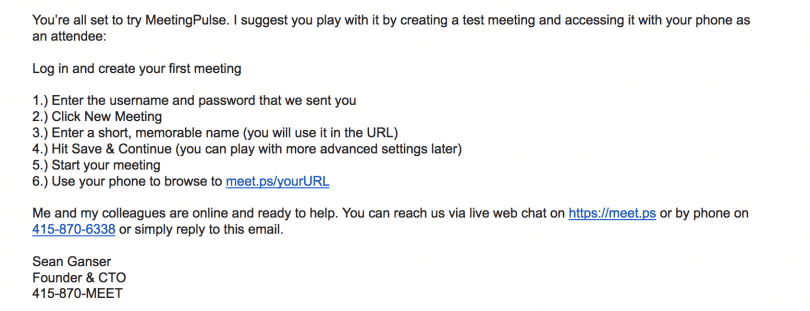
Next, you’ll receive an email like the one shown below, which includes directions to help you create your first meeting using our audience response app. Creating a meeting is the first step toward making your free poll.
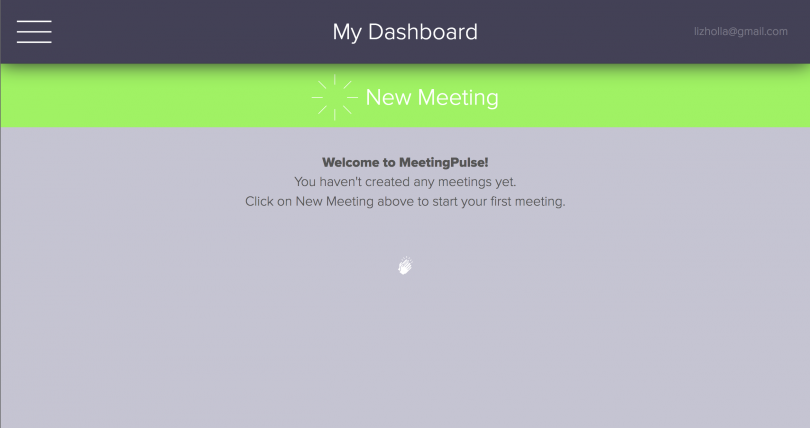
To get started on your free poll creation, sign in and click on ‘New Meeting’ as shown below.
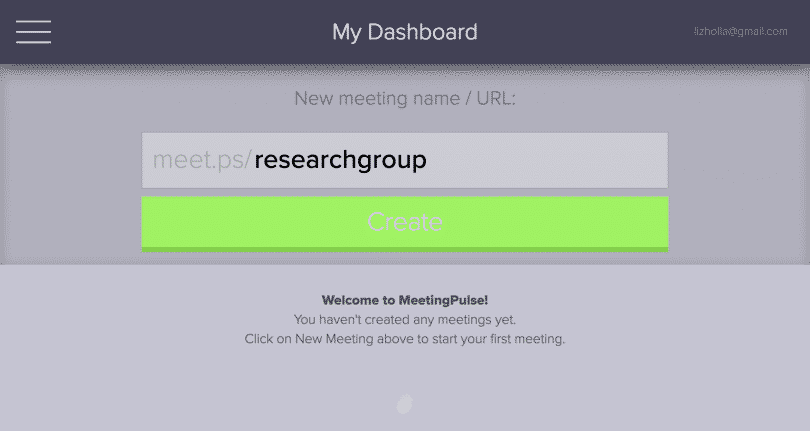
Name your meeting by clicking on ‘Meeting Name’ and replacing it with a name of your choosing. We named this meeting ‘researchgroup.’
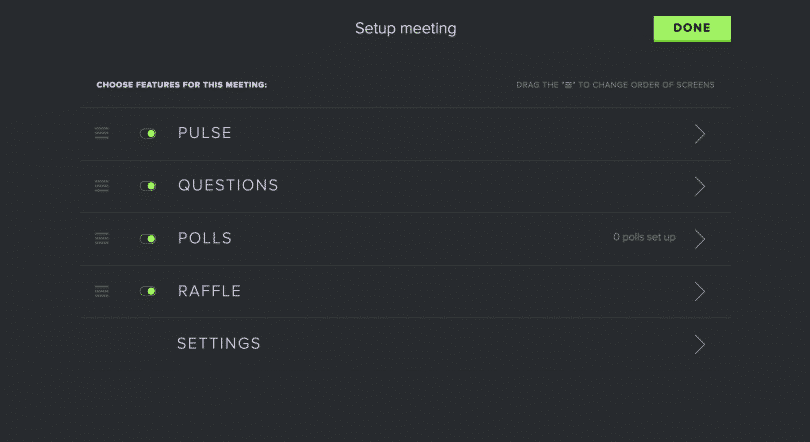
Now, a screen will come up that allows you to choose your next action. Click on ‘Polls.’
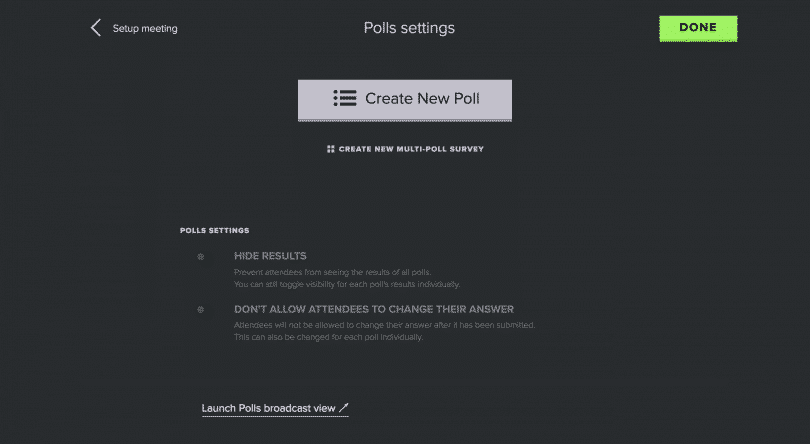
The ‘Create New Poll’ page will now show up on your screen. Before you click on the button to create a free poll, take a look at the options below. You can use the toggle switches to hide poll results from meeting participants or to prevent participants from changing their votes. By default, poll results are visible to everyone and answers are changeable. Once you’ve selected your preferred options, click on the ‘Create New Poll’ button to get started.
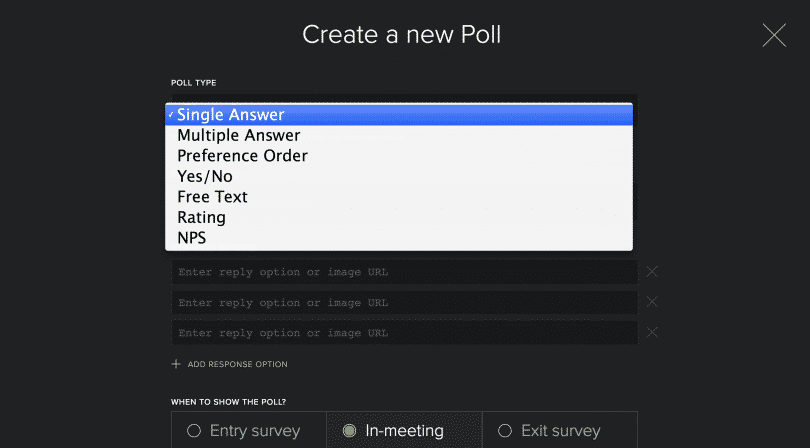
The screen below allows you to create your poll questions and to choose the type of poll you prefer. Meeting Pulse offers various poll types: single answer poll, multiple answer poll, preference order poll, yes/no poll, custom answer poll, and a rating poll.
With these options, in order, you can determine whether your audience members are allowed to choose one or more answers, if you want them to put their answers in order of preference, if the answer options are simply yes/no, if audience members can type in in their own answers, or if you want them to answer by rating on a numbered scale. We chose ‘Single Answer Poll.’
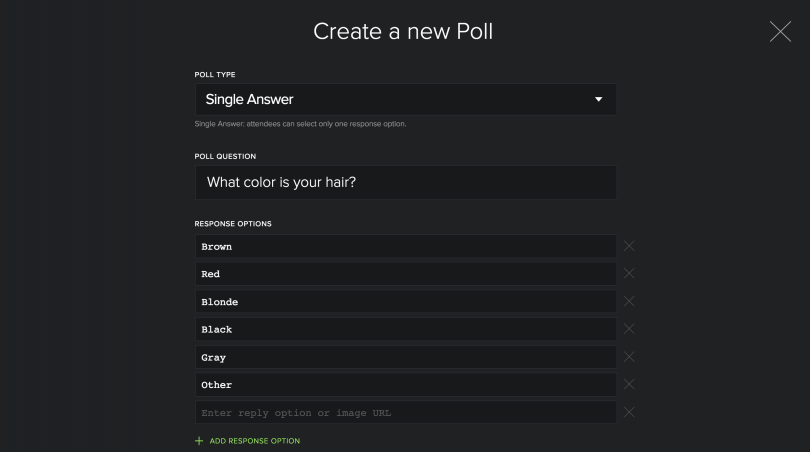
Below, you can see a simple poll that we created to ask our audience about their hair color. Since people generally don’t have more than one color of hair, we chose a single answer poll. First, we entered our question in the box at the top. Then, we entered our answer options below.
Each time you want to add another answer option, either press tab or click on ‘add response option.’ Creating a free poll is easy, as you can see. To create different types of polls, simply use the various intuitive options on the screen for customization.
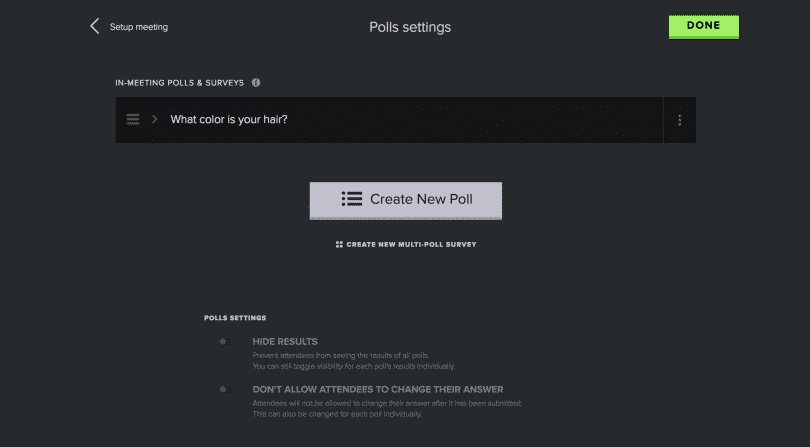
When you’re finished, save your poll. You will then see it in your polls roster, below. By clicking on the gray arrow in the upper left hand corner, you will return to an overview of your meeting that includes a list of your polls and other meeting options.
When you’re ready to launch your meeting – and conduct your new free poll – share your meeting URL with your audience. They simply enter the URL in their browser to participate.
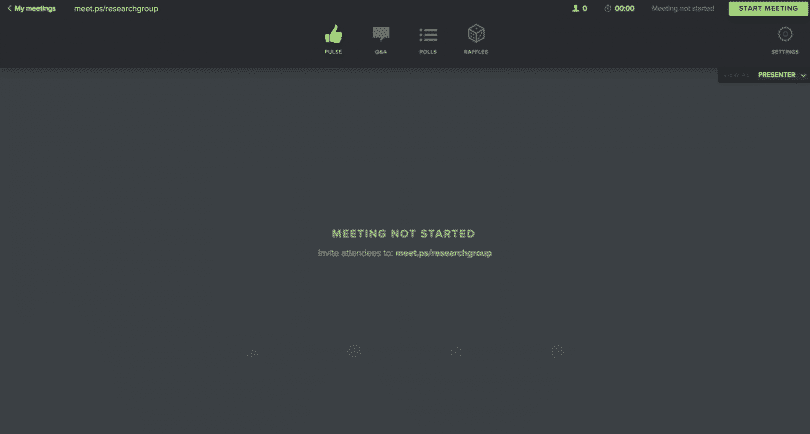
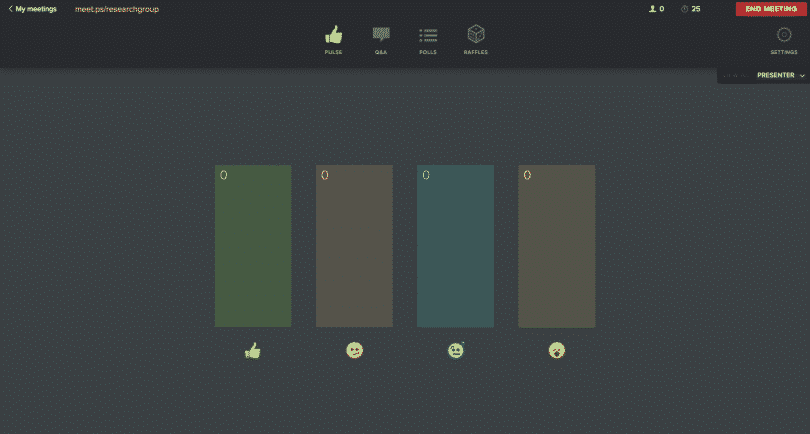
As the facilitator, you guide the audience’s experience from your screen. First, you’ll see the screen below, which is designed to allow audience members to share how they feel with the presenter. Click on ‘Polls’ to see any polls that you have created for use during your meeting.
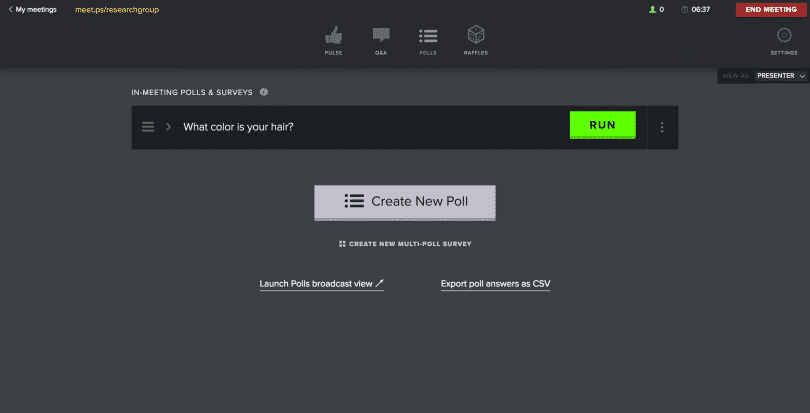
All of your polls will be listed on the Polls page. In our case, we only created one poll. To activate a poll, click on ‘Run.’
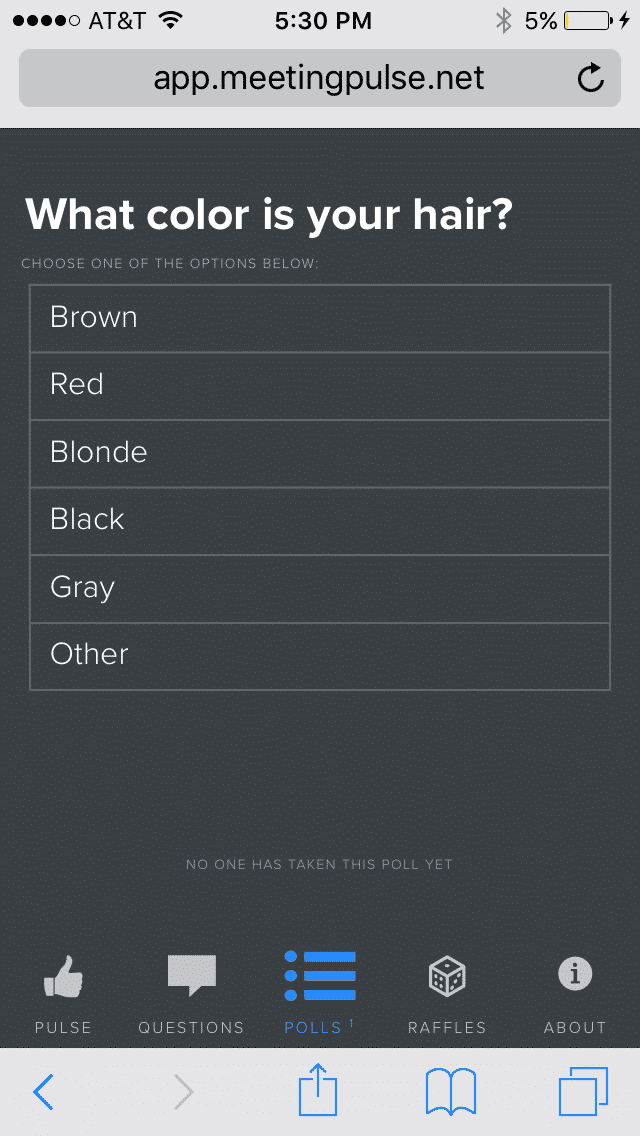
As soon as you run a poll, your audience will see it appear on their device, as demonstrated below. Everyone will see a version of this screen whether they are using a smartphone, tablet, or computer. Audience members simply click on their answer of choice and the poll results will show up on your screen.
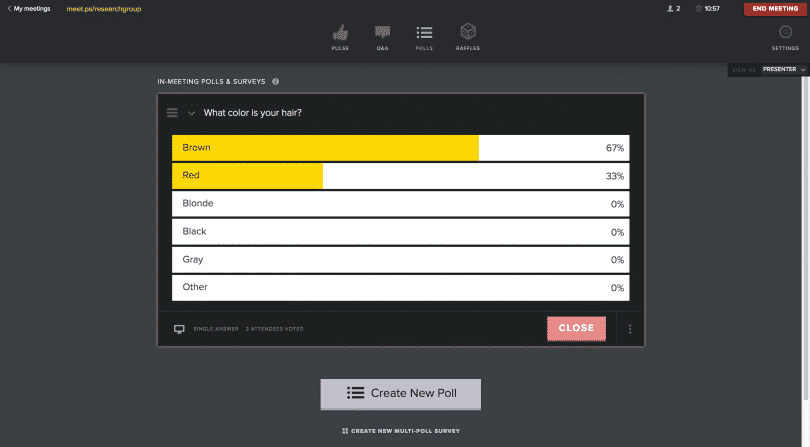
From our presenter screen below, we have access to a few pieces of information. In the upper right hand corner, we can see that we are in the ‘researchgroup’ meeting and that it has been running for 3 minutes and 57 seconds.
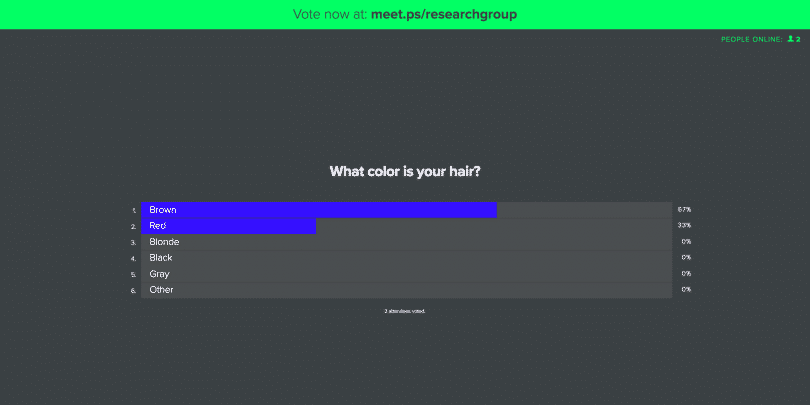
We can also tell that 3 people are currently signed into the meeting. Based on the bar graph below, two of those people have brown hair and one has red hair. When you are finished with your poll, click on ‘Close.’
If you are giving a digital presentation, you can easily switch to a screen that shows poll results in a format appropriate for display, as shown below.
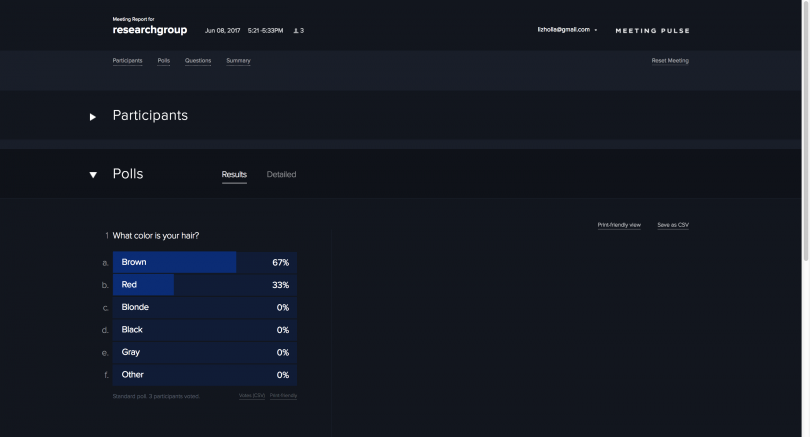
When all participants have provided their answers, you can close your meeting with one click and view all results on a comprehensive dashboard, shown below. With MeetingPulse, all meeting results are saved, so you can easily go back and revisit poll or survey results at a later time.
It’s that easy! Congratulations! Now you know how to create a poll using our audience response app.
With the MeetingPulse trial, you get access not only to free poll creation, but the ability to create and run surveys, sentiment pulses, raffles, open question sessions, and audience follow-up activites. Thanks to MeetingPulse, interactive meetings are right at your fingertips!
At MeetingPulse, we provide a real-time survey and polling app that runs in any browser, so you’ll never need to download anything. Anyone can easily participate using their mobile device or computer via a short link.
MeetingPulse technology was developed with simplicity in mind and offers a wide array of customizable options to fit your interactive meeting needs.
Please contact us for more information on our audience response app or click on ‘Keep Me Posted’ on our blog page to receive blog updates and our free ebook.
